


How to Install Artificial Grass on Concrete
Installing artificial grass on concrete is one of the fastest ways to turn a dull patio, rooftop, or pool deck into a comfortable outdoor living space. The process is different from a standard ground installation, though. Concrete does not absorb water, does not allow stakes or nails, and holds heat in direct sunlight. Each of those factors changes how you prepare the surface, secure the turf, and handle drainage.
Need help with your project? Connect with a Go Green dealer-installer near you.
This guide breaks down everything you need to know before and during a concrete turf installation, from surface prep and underlayment choices to adhesive options and long-term maintenance.
Can You Put Artificial Grass Directly on Concrete?
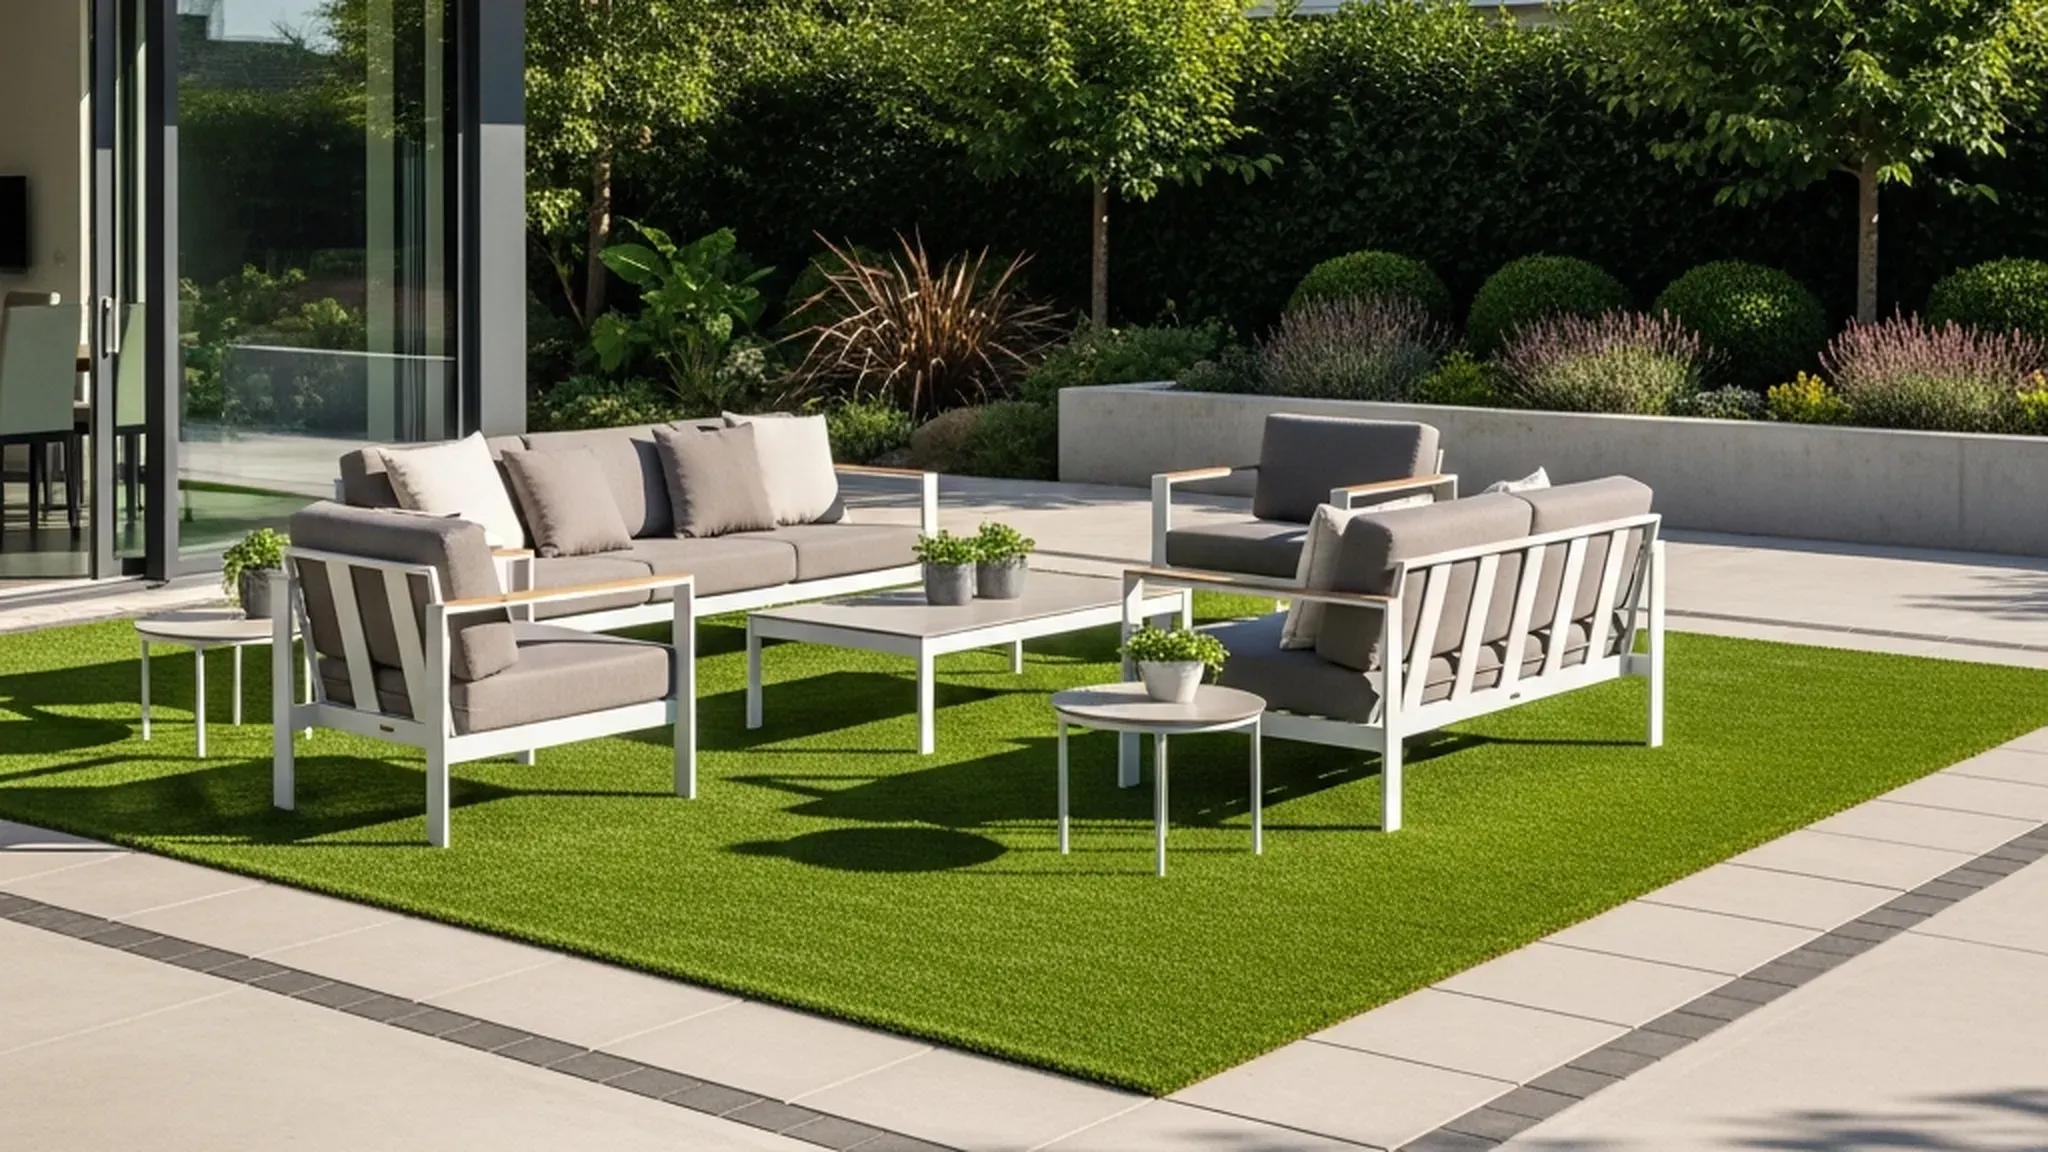
Yes, you can install artificial grass on concrete, and it is one of the more common applications for synthetic turf. Patios, balconies, pool surrounds, rooftops, garage conversions, and commercial walkways all use concrete as a base.
Concrete is stable and flat, which means you skip the excavation, base rock compaction, and weed barrier steps required for soil installations. But that stability comes with trade-offs you need to plan for:
- No natural drainage. Water sits on the surface unless you create a path for it to escape.
- No mechanical fastening. You cannot use landscape staples or nails. The turf must be glued, taped, or weighted down.
- Heat retention. Concrete absorbs and radiates heat, which raises the turf surface temperature on sunny days.
- Hard surface. Without padding, the turf feels thin underfoot and offers little shock absorption.
All four of these issues are solvable with the right materials and preparation. The rest of this guide walks through each one.
How Does Artificial Grass Drain on Concrete?
Drainage is the single biggest consideration when installing turf on concrete. On a soil-based install, water passes through the turf backing and percolates into the ground. Concrete blocks that path entirely. If you skip drainage planning, water pools under the turf, creating mold, mildew, and odor problems within weeks.
There are three ways to handle drainage on concrete:
1. Slope the Concrete (Simplest Option)
If your concrete already has a 1-2% grade (about 1/4 inch of drop per foot), water will naturally sheet off the surface and flow to the edges. Most patios and pool decks are poured with this slope built in. Check yours by pouring water on the surface and watching where it travels. If it drains to the edge within a few seconds, slope alone may be enough for light rain.
2. Add Drainage Panels or Mats
For flat or low-slope concrete, install a drainage layer between the concrete and the turf. Options include:
- Foam drainage mats (1/4″ to 1/2″ thick) with channels that direct water to the perimeter
- Geocell or egg-crate panels that create an air gap under the turf
- Perforated shock pads that provide both cushion and drainage in a single layer
A drainage layer is strongly recommended for any installation larger than 100 square feet or any area that receives direct rainfall. For a deeper breakdown of how turf drainage systems work, see our guide on how artificial turf drainage works.
3. Choose High-Drainage Turf
Turf products are not equal when it comes to water flow. Standard polyethylene turf on a solid urethane backing drains at 30-50 inches per hour. Compare that to a product like AQUAMAXX 90, which drains at over 1,000 inches per hour through a perforated backing system. On concrete, where water has nowhere to go but sideways, high-drainage turf makes a measurable difference.
The best approach combines all three: start with adequate slope, add a drainage mat, and use turf with a high-drain backing. That way, even heavy rain clears the surface in minutes.
What to Put Under Artificial Grass on Concrete
An underlayment layer between the concrete and the turf serves two purposes: cushioning and drainage. Here is how the common options compare:
| Underlayment Type | Thickness | Cushion | Drainage | Best For |
|---|---|---|---|---|
| Foam shock pad | 1/4″ – 1/2″ | Good | Moderate | Patios, play areas |
| Rubber underlay | 3/8″ – 3/4″ | Excellent | Low | Playgrounds, gyms |
| Drainage tile/panel | 1/2″ – 1″ | Minimal | Excellent | Pool decks, rainy climates |
| Combination pad (cushion + drain) | 1/2″ – 3/4″ | Good | Good | General purpose |
For most residential patios, a combination shock pad with perforations offers the best balance. For rooftop and balcony installations, prioritize drainage panels since these areas are fully exposed to rain with no soil absorption anywhere nearby.
Skip the underlayment only if the concrete is smooth, the area is covered (like an indoor gym or showroom), and cushion is not a priority. For indoor concrete floors, foam padding alone is usually sufficient because drainage is not a concern.
Browse Go Green’s full product lineup to find the right turf for your concrete project.
How to Get Artificial Grass to Stick to Concrete
Without stakes or nails, you need an alternative way to secure the turf. There are three main attachment methods for concrete surfaces:
Turf Adhesive (Most Secure)
A specialized turf adhesive like TurfTak bonds the turf backing directly to the concrete (or to the underlayment). Apply it along the perimeter, seams, and in a grid pattern across the middle. Adhesive is the most reliable method for areas that get foot traffic, furniture movement, or wind exposure.
Tips for adhesive application:
- Apply in 6-8 inch bands along all edges and seams
- Add adhesive every 2-3 feet across the center of large areas
- Work in sections so the adhesive stays tacky as you press the turf down
- Allow 24 hours for full cure before heavy use
Double-Sided Seam Tape
Seam tape provides a strong hold along edges and seam lines without the mess of liquid adhesive. Standard 12-inch seam tape works well for joining turf panels and securing perimeter edges on covered or semi-covered areas. This method is easier to reverse than adhesive if you plan to remove the turf later.
Loose-Lay with Perimeter Weights
For temporary installations, events, or renters who cannot modify their concrete, loose-laying the turf works if you weight the edges. Use heavy planters, outdoor furniture, or rubber edge strips to keep the turf from shifting. This only works well for smaller areas (under 200 square feet) with limited foot traffic.
Step-by-Step Installation on Concrete
Once you have your materials, follow these steps. For a broader overview of artificial turf installation on all surface types, see our step-by-step installation guide.
1. Clean and Inspect the Concrete
Sweep or power wash the surface to remove dirt, debris, moss, and loose material. Fill cracks wider than 1/4 inch with concrete patch compound and let it cure. Check for low spots where water collects. If you find significant pooling areas, consider self-leveling compound to correct them before proceeding.
2. Test Drainage
Spray the surface with a hose and watch where water flows. Mark any low spots that hold water for more than 30 seconds. If the slab is flat with no slope, plan for a drainage layer.
3. Install Underlayment
Roll out your foam pad or drainage panels across the entire surface. Butt the panels tightly together without overlapping. Secure them with adhesive or tape to keep them from shifting when you unroll the turf on top.
4. Roll Out and Position the Turf
Unroll the turf and let it acclimate in the sun for 1-2 hours. This relaxes the backing and removes wrinkles from storage. Position the turf so all blades face the same direction (toward your primary viewing angle for the most natural appearance). Leave 1/2 inch of excess along each edge for trimming.
5. Trim to Fit
Use a sharp utility knife to cut the turf along walls, edges, and obstacles. Cut from the back side of the turf (the backing) for cleaner lines. Take your time around curves, posts, and transitions.
6. Seam Multiple Pieces
If your area requires more than one roll, align the pieces so the blade direction matches. Pull back both edges, lay seam tape underneath, and press both pieces firmly onto the tape. Use adhesive along the seam for extra strength.
7. Secure the Perimeter
Apply turf adhesive or tape around the entire perimeter, pressing the turf firmly into the bond. For a finished look, use aluminum or composite edge trim where the turf meets exposed concrete borders.
8. Add Infill (If Required)
Some turf products need infill to keep blades upright and add weight. Spread silica sand or antimicrobial infill (like Envirofill with Microban) evenly across the surface using a drop spreader, then brush the blades with a stiff-bristle broom to work the infill down. Not all turf requires infill. Products like HEATMAXX Soft are designed to hold their shape without it.
9. Brush and Inspect
Give the entire surface a final brushing against the grain to stand the blades up. Walk the perimeter to check for loose edges, visible seams, or wrinkles. Address any issues while the adhesive is still within its working window.
Heat Management: Why It Matters on Concrete
Concrete absorbs solar energy and re-radiates it, which raises the temperature of anything sitting on top of it. On a 90-degree day, a concrete surface can reach 140 degrees or higher. Turf installed directly on hot concrete will feel warmer underfoot than turf on a soil base.
Three ways to manage heat on concrete installations:
- Choose heat-resistant turf. Standard polyethylene turf softens at about 165 degrees Fahrenheit. Nylon turf, like the HEATMAXX Soft product line, withstands temperatures up to 428 degrees Fahrenheit and is the only turf warranted against Low-E window reflective burn damage. If your patio sits near energy-efficient windows, nylon turf eliminates the risk of melting. For more on this topic, see our article on window reflection turf burn.
- Add a foam underlayment. A 1/2-inch pad insulates the turf from direct contact with hot concrete, reducing surface temperature by 10-15 degrees.
- Spray with water. A quick rinse with a garden hose drops the turf surface temperature by 30-50 degrees almost instantly. This is the simplest and most effective cooling method for everyday use.
If you are choosing turf specifically for a heat-exposed area, our guide on choosing artificial turf for your climate walks through product selection based on regional conditions.
Best Turf Types for Concrete Surfaces
The right turf product depends on where the concrete is and how the space will be used. Here are the best matches by application:
- Patios and entertaining areas: A mid-weight polyethylene turf (60-75 oz/sy) with a soft hand feel and moderate drainage. Look for a combination of comfort and durability that handles furniture and foot traffic.
- Pool decks: Prioritize drainage above everything else. AQUAMAXX products drain at 600-1,000+ inches per hour, which prevents standing water around the pool edge. Chlorine-resistant backing is also important for longevity.
- Rooftops and balconies: Weight matters. Lighter turf (40-50 oz/sy) puts less load on the structure. Pair it with drainage panels since rooftop concrete is fully exposed. Also confirm the turf carries a Class A fire rating if your building code requires it.
- Play areas: Use a thick rubber or foam underlayment (3/4″ minimum) for fall protection. Check ASTM F1292 fall-height ratings if children will be playing on the surface.
- Commercial spaces: High-traffic commercial applications benefit from heavier face weight (75-90 oz/sy) with strong tuft bind to resist wear.
Ready to start your concrete turf project? Get connected with a Go Green installer near you.
Common Mistakes to Avoid
After working with thousands of installations, these are the errors we see most often on concrete projects:
- Skipping the drainage layer. This is the number-one cause of failed concrete installations. Water trapped under the turf leads to mold, bacteria, and lifting. Even if your slab has good slope, a drainage mat provides insurance.
- Using the wrong adhesive. General construction adhesive or hot glue will not hold turf long-term. Use a product specifically designed for synthetic turf on hard surfaces, like TurfTak adhesive.
- Not cleaning the concrete first. Dust, oil, and loose paint prevent adhesive from bonding. Power washing is the safest way to get a clean surface.
- Forgetting about expansion gaps. Leave 1/4 inch between the turf edge and any walls or fixed structures. Turf expands slightly in heat, and tight edges will buckle.
- Installing in cold weather. Turf backing stiffens in cold temperatures, making it harder to flatten and adhere. If possible, install on a day above 50 degrees Fahrenheit.
What Does It Cost to Install Turf on Concrete?
Costs vary depending on the turf product, underlayment, and whether you hire a professional or do it yourself. Here are rough ranges for materials only:
| Item | Cost Per Square Foot |
|---|---|
| Artificial turf (mid-range) | $2.20 – $4.05 |
| Foam shock pad / drainage mat | $0.50 – $1.50 |
| Turf adhesive | $0.15 – $0.30 |
| Seam tape | $0.10 – $0.20 |
| Infill (if needed) | $0.25 – $0.50 |
Total materials for a DIY install typically run $3.20 to $6.55 per square foot, depending on the turf and pad you choose. Professional installation adds $2 to $5 per square foot for labor. For a 200-square-foot patio, expect to spend $640 to $1,310 on materials alone. For a detailed cost breakdown, see our synthetic turf cost per square foot guide.
Maintenance After Installation
Turf on concrete requires less maintenance than turf on soil since there are no weeds to manage and no infill settling into the ground. A basic routine includes:
- Weekly brushing with a stiff-bristle broom to keep blades upright, especially in high-traffic zones
- Rinsing with a hose every 1-2 weeks to remove dust and pollen (this also cools the surface in summer)
- Spot cleaning spills with mild soap and water
- Checking edges quarterly to confirm the adhesive or tape is still holding
For a full maintenance walkthrough, including seasonal tips and stain removal, check our synthetic turf cleaning and maintenance guide.
Frequently Asked Questions
Can I just lay artificial grass on concrete without glue?
You can loose-lay turf on concrete for small areas or temporary setups by weighting the edges with furniture, planters, or rubber strips. For permanent installations or areas larger than 200 square feet, adhesive or seam tape is necessary to prevent shifting, tripping hazards, and wind lift.
Do you need drainage for artificial grass on concrete?
Yes. Concrete does not absorb water, so moisture has to travel sideways to the edges. Without slope or a drainage layer, water gets trapped under the turf and causes mold and odor problems. At minimum, confirm your concrete has adequate slope. For flat surfaces, add drainage panels beneath the turf. Products like drainage mat systems are designed specifically for this purpose.
What is the best adhesive for artificial grass on concrete?
Use a turf-specific adhesive designed for hard surfaces. General-purpose construction adhesives break down with UV exposure and moisture cycling. Go Green’s TurfTak adhesive is formulated for concrete-to-turf bonding and provides long-term hold in outdoor conditions.
How long does artificial grass last on concrete?
With proper installation and basic maintenance, quality artificial grass lasts 15 to 20 years on concrete. Premium nylon products like HEATMAXX carry a 15-year prorated warranty. The lifespan depends on sun exposure, foot traffic, and whether the underlayment and drainage were installed correctly.
Does artificial grass get hot on concrete?
It can. Concrete holds heat, and turf surface temperatures rise on hot days. Using a foam underlayment, choosing lighter turf colors, and rinsing with water on hot afternoons are the most practical ways to keep the surface comfortable. For areas with extreme heat or nearby reflective windows, nylon turf rated to 428 degrees Fahrenheit is the safest choice.
Leave a Reply