


Step-by-Step Artificial Turf Installation
The secret to a flawless lawn isn’t just the beautiful green turf on top; it’s the rock-solid foundation built underneath. The most critical phase of any DIY artificial turf installation is preparing the ground correctly. Rushing this step can lead to sinking spots, visible seams, and drainage problems that are a real headache to fix later. This guide is all about getting that groundwork right from the very beginning. We’ll walk you through every detail of creating a stable, perfectly graded base that ensures your turf stays smooth, drains efficiently, and stands up to years of foot traffic and fun. Learn more about artificial turf drainage system.
Key Takeaways
- A solid foundation is non-negotiable: The success of your project depends entirely on the base. Proper excavation, creating a slight slope for drainage, and thoroughly compacting your base materials are the most important steps for preventing future lumps, sinking, and puddles.
- Match your turf to your lifestyle: The best turf for your yard depends on how you’ll use it. Consider factors like climate, foot traffic, and whether you have pets or kids to choose a product with the right pile height, density, and features like cooling technology or superior drainage.
- Precision in the final steps makes all the difference: Achieving a professional look is all in the details. Take your time to make clean cuts, create invisible seams by aligning the turf grain, and evenly spread the infill to ensure your lawn looks flawless and performs well for years.
Why DIY Your Install Artificial Turf Yourself?
Deciding to install artificial turf is a fantastic step toward getting a beautiful, hassle-free lawn. Taking it on as a DIY project can be incredibly rewarding, giving you complete control over the outcome while saving a significant amount on installation costs. While it requires careful planning and some physical work, the result is a professional-grade lawn that you built yourself. A successful DIY installation gives you a deep understanding of your new yard and the satisfaction of knowing you’ve made a lasting improvement to your home.
This guide is here to walk you through every step, from picking the right materials to laying the final strip of turf. The benefits go far beyond just having a green yard. You’re investing in a low-maintenance lifestyle, long-term financial savings, and a notable increase in your property’s curb appeal. With the right installation guidance and high-quality products, you can achieve a flawless finish that looks incredible for years to come. Let’s get started by looking at exactly why this project is worth your time and effort.
Understand the Costs and Savings
Professional vs. DIY Installation Costs
One of the biggest motivators for a DIY turf project is the potential for significant savings. While professional installation offers convenience, it comes at a premium, often costing two to three times more than doing it yourself. The bulk of that extra cost is labor. By taking on the work, you’re essentially paying yourself for your time and effort. For a typical backyard project, this can translate into saving several thousand dollars—money that can go right back into your home, your garden, or your next big project. It’s a trade-off, of course, exchanging your time and sweat for a major reduction in the final price tag.
The savings don’t stop once the installation is complete. In fact, that’s just the beginning. Think about the recurring costs of maintaining a natural lawn: the water bill, the fertilizer, the mower fuel, and the weekend hours you’ll get back. An artificial lawn eliminates those expenses and chores entirely. You’re not just getting a beautiful yard; you’re investing in a low-maintenance lifestyle and adding real value to your property. Choosing high-quality synthetic turf products ensures that these benefits last for years, giving you a great return on your initial investment through both curb appeal and long-term financial savings.
Say Goodbye to Mowing and Weeding
Imagine your weekends without the constant cycle of mowing, weeding, and fertilizing. Artificial turf gives you a perfectly manicured lawn year-round, without the endless chores. It’s a clean, durable surface that doesn’t turn into a mud pit after it rains, making it perfect for kids and pets to play on in any weather. For pet owners, specialized turf systems like PETMAXX® offer excellent drainage and durability to handle daily use. Ultimately, a synthetic lawn lets you spend less time working on your yard and more time actually enjoying it.
Lower Your Water Bills and Save Money
While the initial cost of artificial turf is higher than natural grass seed, it’s a smart long-term investment. Over the typical 15-year lifespan of a turf system, you’ll save a substantial amount of money. Think about it: no more spending on water to keep your grass green, especially during dry seasons. You can also say goodbye to the recurring costs of fertilizers, pesticides, and lawn care equipment (and the fuel or electricity to run it). When you factor in these savings, the upfront investment in quality turf products pays for itself over time.
Enjoy a Safer, Greener Lawn
Artificial turf offers a genuinely greener lawn, and not just in color. By eliminating the need for constant watering, you significantly reduce your water consumption. You also get to ditch the fertilizers and pesticides, which is better for the local ecosystem and creates a much safer environment for your family. This means kids and pets can play freely without you worrying about them coming into contact with harsh chemicals. You can enhance this safety even further by choosing the right turf for your needs. For instance, systems with advanced cooling technology like HEATMAXX® SOFT keep the surface comfortable on sunny days, while turf designed for superior drainage, such as our AQUAMAXX® line, prevents puddles and slippery spots. It’s all about creating a beautiful space that’s as safe and sustainable as it is low-maintenance.
Increase Your Home’s Curb Appeal and Value
Great curb appeal makes a powerful first impression, and a lush, green lawn is a major part of that. High-quality synthetic grass maintains its vibrant, well-kept appearance throughout the year, which can directly enhance your property’s value. Unlike a natural lawn that can develop brown spots or weeds, artificial turf provides a consistently beautiful landscape that potential buyers see as a valuable, low-maintenance feature. You can see how transformative a great installation can be in our project gallery. A well-installed turf system is a durable, attractive upgrade that adds lasting appeal to your home.
Your DIY Turf Installation Shopping List
A successful DIY project starts with having everything you need before you begin. Gathering your tools and materials upfront saves you from last-minute trips to the hardware store and keeps your project on track. Think of it in three main categories: the turf itself, the materials for the base layer underneath, and the tools and fasteners required to put it all together. Getting organized now means you can focus on each step of the installation process without any interruptions. Let’s walk through exactly what you’ll need to have on hand.
How to Pick the Perfect Artificial Turf
Selecting the right artificial turf is the most important decision you’ll make. The best products feature robust construction, quality yarn materials, and a resilient backing that can stand up to weather and foot traffic. Your specific needs will guide your choice. Are you creating a play area for kids and pets? You’ll want something durable and non-toxic, like our PETMAXX® turf. If you live in a hot climate, a turf with cooling technology like HEATMAXX® SOFT will keep your lawn comfortable. Take a look at all the product options available and think about pile height, density, and color to find the perfect match for your vision.
What Goes Underneath Your Turf?
What’s underneath your turf is just as important as the turf itself. A solid base ensures your lawn stays level, drains properly, and lasts for years. The first layer is typically a sub-base of crushed rock, like decomposed granite or Class II road base, which provides stability. A good rule of thumb is to lay a base of about 2 to 4 inches, depending on your soil type and expected use. You’ll also need infill, which is spread over the top of the turf after it’s installed. Infill helps the blades stand up, adds cushioning, and weighs the turf down. You can find quality infill and other accessories to complete your project.
Essential Tools for a Flawless Finish
Having the right tools makes the job much easier. Here’s a basic list of what you’ll need:
- Shovel and wheelbarrow
- Measuring tape
- Utility knife with extra blades
- Landscape rake or push broom
- Vibrating plate compactor (you can usually rent one)
- Drop spreader for infill
To secure the turf, you’ll need 5- to 6-inch galvanized nails or landscape staples. Plan to place them every 6 to 12 inches around the perimeter and every couple of feet throughout the center to keep everything tight and prevent lifting. For projects with multiple pieces of turf, you will also need seam tape and adhesive to create invisible connections between sections. Our complete installation guide offers more detailed specifications for every step.
Prepping Your Yard for Artificial Turf
A great-looking lawn starts from the ground up, literally. Preparing your installation area correctly is the single most important part of the entire project, and it’s where you can really set yourself up for success. This is the foundation that ensures your turf stays smooth, drains properly, and lasts for years. Skipping or rushing these steps can lead to bumps, puddles, and a lot of frustration down the road. For professional installers, solid prep work means fewer callbacks and happier clients. For homeowners, it’s the difference between a project you’re proud of and one that needs constant fixing. By taking the time to clear, grade, and build a solid base, you’re guaranteeing a professional result that performs as good as it looks.
Plan Your Project Timeline and Layout
Before you pick up a shovel, take some time to map out your project. A solid plan is your best tool for a smooth installation. It helps you estimate how long the work will take, how much material you’ll need, and where to place your turf rolls to minimize waste and visible seams. Thinking through these details now saves you from headaches later and ensures you use your time and resources efficiently. This planning phase is all about working smarter, not harder, to get that perfect, professional-looking lawn.
How Long Does Installation Take?
The time it takes to install your turf depends heavily on the size of your yard and how much ground preparation is needed. For a small, straightforward area around 200 square feet, you might be able to complete the project in a single day. However, a larger space of 750 square feet or more could take three to four days, especially if you need to do extensive excavation or grading. Remember, the base preparation is the most labor-intensive part of the job. Be realistic with your timeline and don’t rush the foundation—it’s the key to a long-lasting result.
Map Your Layout to Minimize Seams
Artificial turf typically comes in 15-foot-wide rolls, so planning your layout is essential for a clean look. Measure your space carefully and sketch out how you’ll place each piece to minimize the number of seams. Always ensure the grain of the turf—the direction the blades lean—is facing the same way for all sections to create a uniform appearance. When you’re ready to cut, give yourself an extra inch or two around the edges. It’s much easier to trim a little excess for a perfect fit than to end up with a piece that’s too small. Our detailed installation guide provides more tips on handling seams.
Conduct a Site Safety Check
Safety should always be your first priority. Before you start digging, you need to know what’s buried in your yard. Take the time to locate and mark any sprinkler heads, irrigation lines, electrical wires, or utility pipes. In most areas, you can call 811 a few days before you plan to start, and a crew will come out to mark the location of public utility lines for free. This simple step can prevent costly damage, service outages, and serious injury. Clearing the area of any potential hazards ensures a safe worksite for you and your family.
Install a Border for a Clean Edge
A border is the finishing touch that gives your artificial turf a sharp, professional look. It does more than just create a clean line between your lawn and flower beds; it also serves a critical structural purpose. A sturdy border, whether it’s made of bender board, pavers, or concrete, locks in your base materials and prevents them from washing away over time. This helps maintain the integrity of your foundation and keeps the edges of your turf securely in place. You can see examples of beautifully finished projects in our online gallery to get ideas for your own space.
Clear Away Old Grass and Debris
First things first, you need a clean slate. This means removing every bit of the old lawn, including grass, weeds, roots, and large rocks. You’ll want to dig down about four to six inches to get everything out. For larger areas, renting a sod cutter can save you a ton of time and backache. The goal is to create a completely clear and uniform surface, free of any organic material. Why is this so important? Any leftover roots or grass will decompose over time, creating soft, uneven spots under your new turf. A perfectly clean base is the only way to get that smooth, manicured look that stays that way.
Create a Gentle Slope for Proper Drainage
Water needs a place to go, and you definitely don’t want it pooling on your turf or sitting against your home’s foundation. Proper drainage starts with creating a gentle slope that directs water away from any buildings, patios, or walkways. A good rule of thumb is to aim for a 1% to 2% grade, which is a drop of about one or two feet for every 100 feet of distance. You can use a level and string line to check your work. This subtle angle is all it takes to guide rainwater to the edges of your lawn or into a drainage system, keeping the surface dry and preventing water damage. Our complete installation guide offers more detailed specs on getting this just right.
How Deep Should Your Base Be?
Your turf’s stability and feel underfoot depend entirely on the base you build beneath it. We recommend a sub-base of four to six inches of crushed stone or a similar aggregate material. Once you’ve spread the material evenly, you need to compact it thoroughly using a plate compactor. After compacting the sub-base, add a final layer of about one inch of leveling sand to create a perfectly smooth surface for the turf to lie on. This layered, compacted foundation provides excellent drainage and prevents the ground from shifting or sinking over time. You can find the right infill and accessories to complete your project with us.
How to Build a Solid Base for Your Turf
Think of the base as the unsung hero of your turf project. What you do here, underneath the beautiful green surface, determines how your lawn will look and perform for years to come. A solid, well-drained foundation is your best defense against lumps, sinking spots, and drainage problems. Taking the time to get this part right is the single most important thing you can do to ensure a professional-quality result that lasts. It’s all about creating a stable, smooth, and porous layer that will support your turf perfectly.
Choosing Your Base: Granite vs. Crushed Stone
Choosing the right material for your sub-base is a critical first step. While you might see various options recommended, the goal is always the same: create a base that compacts tightly and drains efficiently. A mix of small, crushed, angular stones, often called decomposed granite or Class II road base, is an excellent choice. The key is the size of the aggregate; you want stones that are 3/8-inch or smaller. These tiny, sharp-edged rocks lock together like puzzle pieces when compacted, forming a solid, stable surface. Avoid using larger, rounded stones like pea gravel, as they will shift underfoot and won’t provide the firm support your turf needs. The right installation materials make all the difference.
The Right Way to Compact Your Base
Once you’ve spread your base material evenly, it’s time to compact it. This step is absolutely essential for preventing your lawn from settling or developing low spots over time. For the best results, lightly spray the base material with a hose. The moisture helps the fine particles settle and bind together, leading to a much firmer compaction. Next, use a vibrating plate compactor (you can rent one from most tool rental shops) to go over the entire area. Don’t rush this part. You’ll want to pass over every square foot several times, moving in different directions, until the base feels completely solid under your feet. A properly compacted base won’t leave footprints when you walk on it.
Final Grading for a Perfectly Smooth Surface
With the base compacted, your final task is to create a perfectly smooth surface. Any bumps, ridges, or dips in the base will be visible once the turf is rolled out, so precision is key. Use a landscaping rake to level out any high spots and fill in any low areas. For a truly flat finish, you can drag a straight 2×4 board across the surface to screed it. Aim for the final grade of your base to be about a half-inch to three-quarters of an inch below any surrounding hardscaping, like a patio or walkway. This ensures that when you lay your turf, the top of the grass blades will sit perfectly flush with the edge, giving you that clean, professional look you can see in our project gallery.
Your Step-by-Step Artificial Turf Installation Guide
With your base perfectly prepped, it’s time for the most rewarding part: laying the turf. This is where your project transforms from a construction site into a beautiful, green lawn. Getting these next steps right is crucial for a professional-looking finish that lasts for years. It’s all about patience and precision. Take your time with each step, from positioning the rolls to brushing in the final layer of infill. Follow this guide, and you’ll have a lawn that looks like it was installed by a seasoned pro.
Unroll and Position Your Turf Sections
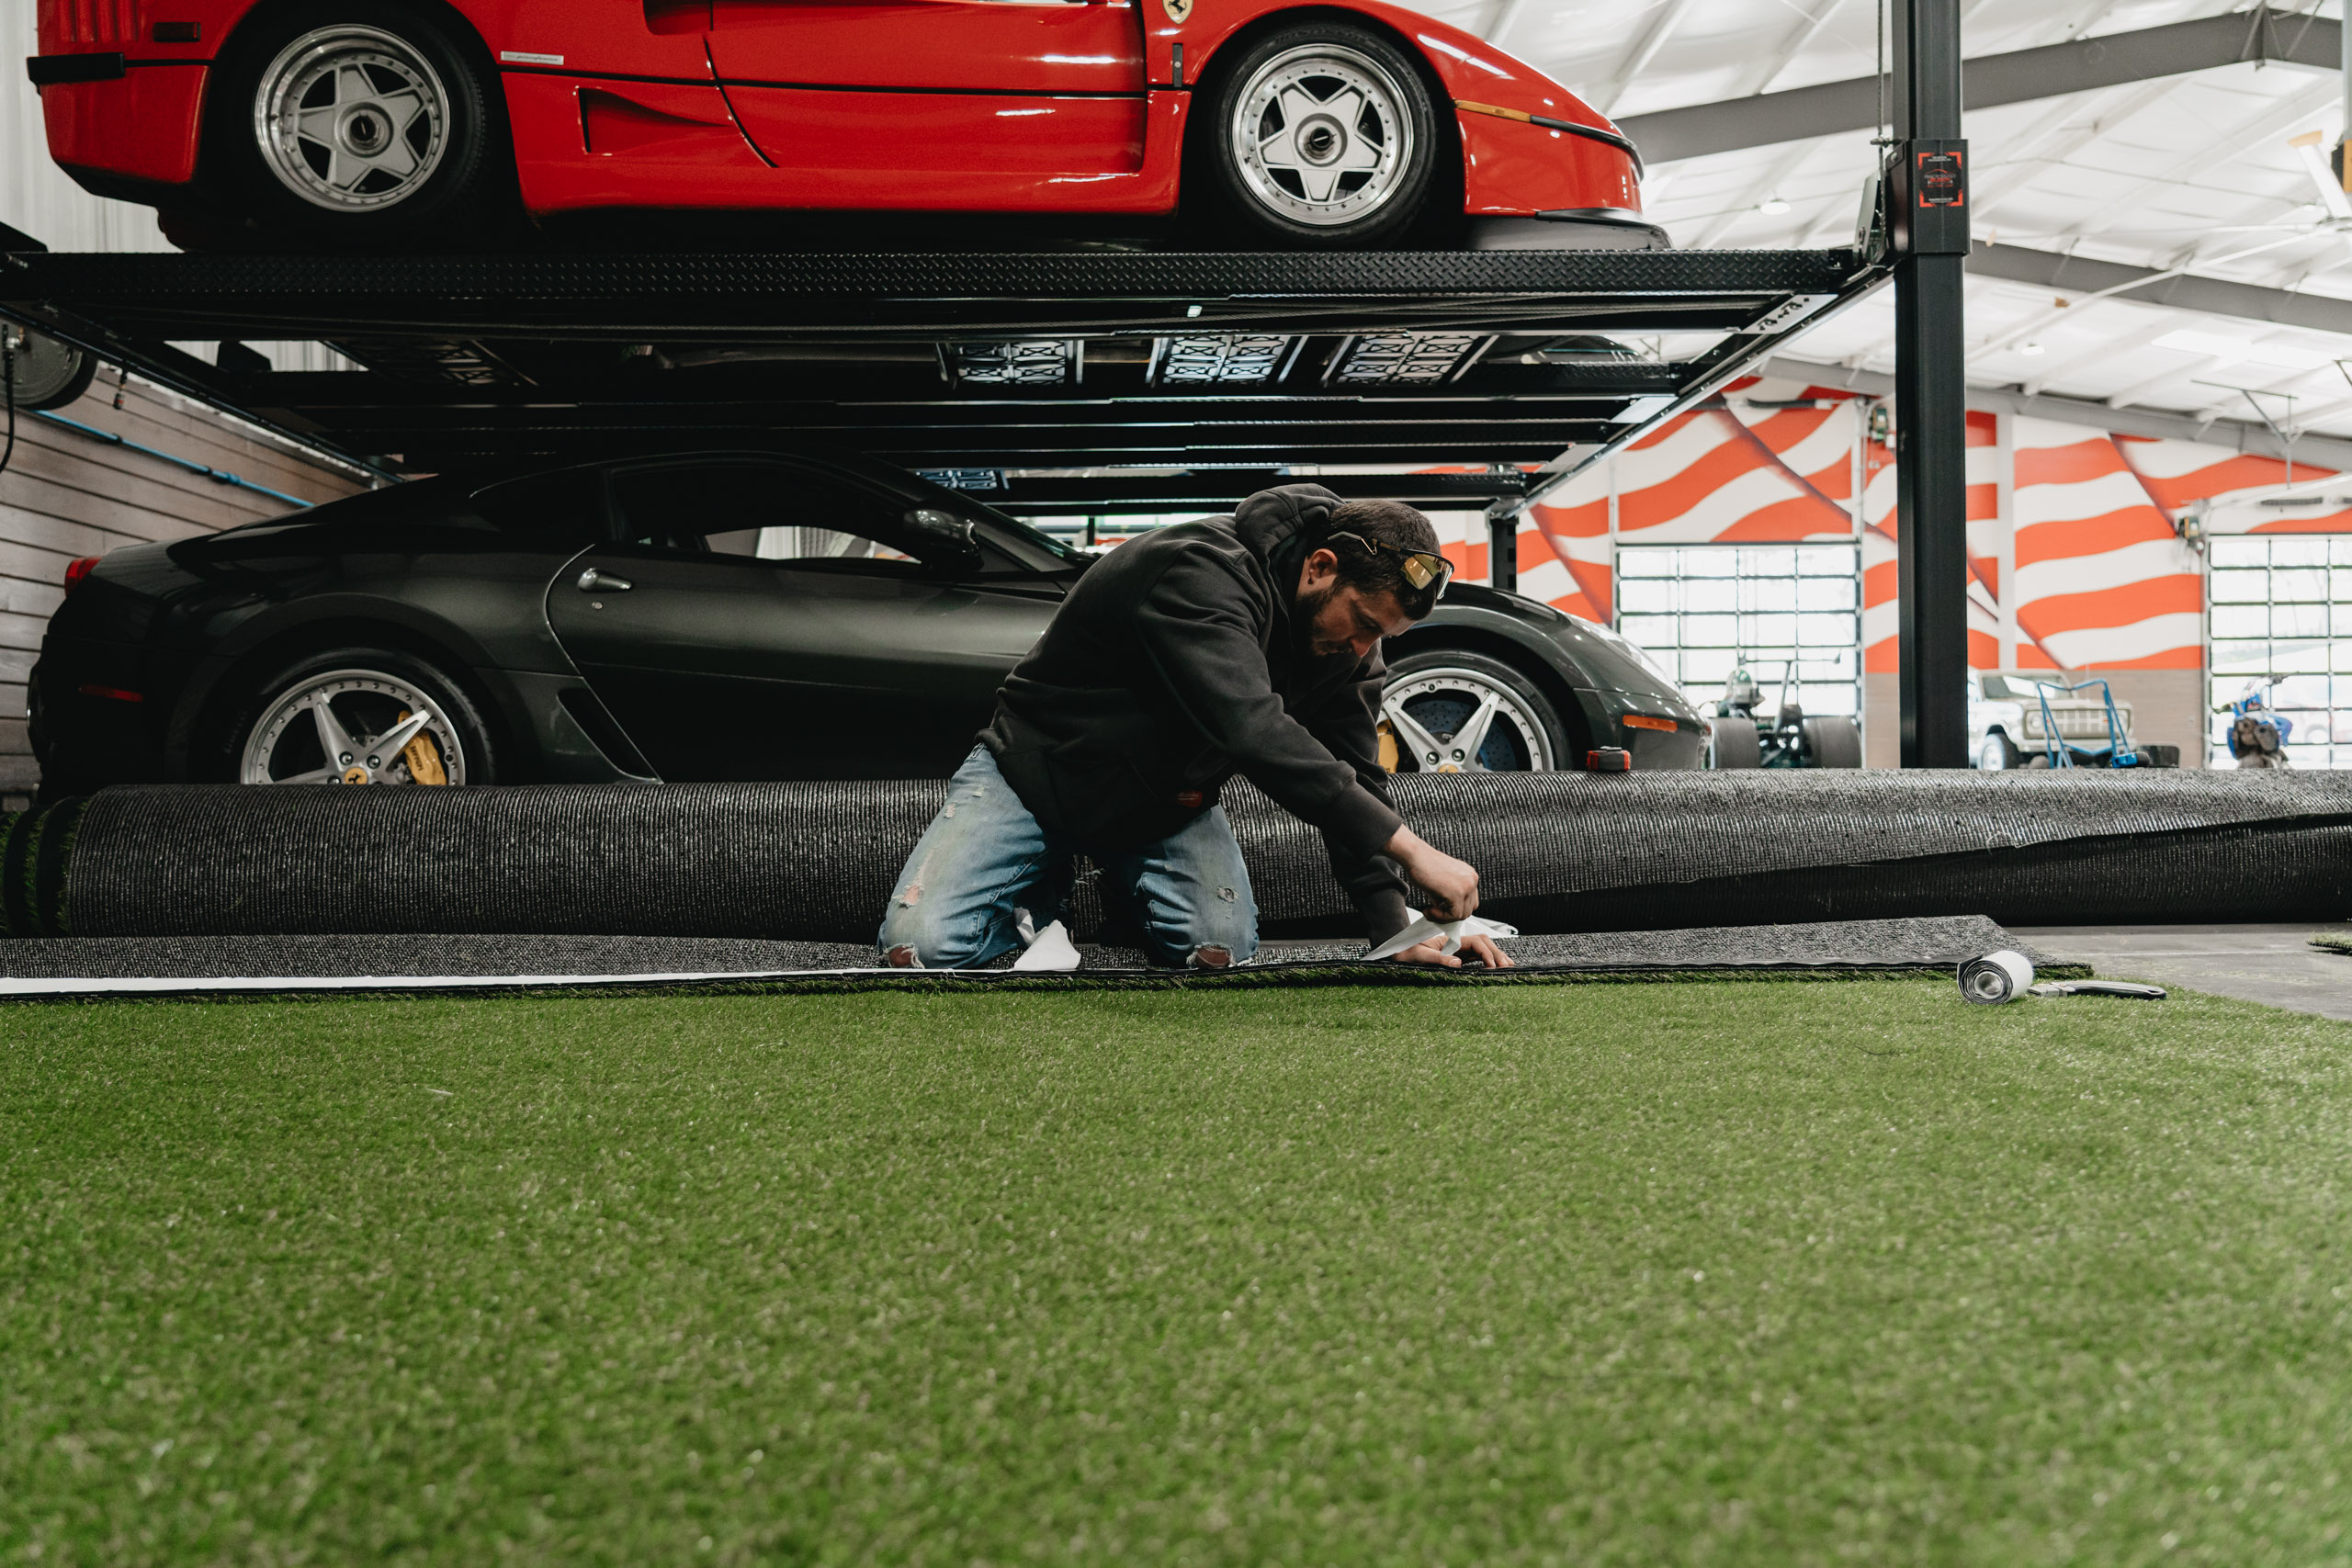
Carefully roll your artificial turf over the prepared base, being careful not to disturb the smooth surface. It’s a good idea to let the turf relax in the sun for an hour or two; this helps release any wrinkles from being packaged. A critical detail for a natural look is ensuring the grain of the grass blades on all your turf products points in the same direction. Before you make any final cuts, trim off the un-tufted factory edge from each side of the turf roll. You can do this by cutting from the back, about two or three stitch rows in, to ensure your seams will be tight and invisible.
Trimming the Edges for a Seamless Look
Now it’s time to custom-fit the turf to your landscape. For straight edges, use a chalk line and a straight edge as a guide. For curves around planters or patios, you’ll need to make more precise relief cuts. Always cut from the black backing of the turf, not from the top through the grass blades. This gives you a much cleaner edge and allows you to follow the stitch rows for straight lines. A sharp utility knife with a fresh blade is your best friend here; change the blade often to avoid tearing the material. Remember the old rule: measure twice, cut once. Taking your time here prevents costly mistakes and ensures a perfect fit.
How to Make Your Seams Disappear
If you’re working with multiple pieces of turf, creating invisible seams is key. Lay the two pieces side-by-side, ensuring the grain runs in the same direction and the gap is just right, about 1/8 of an inch. Fold back the edges and apply seaming tape on the base, then add a quality turf adhesive. Carefully press the turf pieces back down onto the tape, making sure no glue gets on the grass fibers. Once your seams are set, secure the entire perimeter of your lawn using 5- to 6-inch non-galvanized nails every three to six inches. Part the grass blades before hammering so the nail heads disappear into the turf.
Use an S-Curve Cut for Invisible Seams
For a truly professional finish, especially on larger projects, consider using an S-curve cut to join your turf pieces. While a straight cut works well, this advanced technique creates a seam that is virtually impossible to spot. Start by overlapping the two turf pieces by a few inches. Then, using a sharp utility knife, cut through both layers at the same time in a gentle, winding S-shaped pattern. When you remove the excess strips from the top and bottom pieces, you’re left with two perfectly matched edges that fit together flawlessly. This method helps break up any straight visual lines that might catch the eye, making your seam blend right into the lawn.
Securing Your Turf Like a Pro
Once your turf is cut and your seams are glued, the final step is to secure everything in place. This prevents the turf from shifting, wrinkling, or lifting at the edges over time. The right fasteners and a strategic approach will keep your lawn looking tight and uniform for years. You’ll want to use 5- to 6-inch galvanized nails or landscape staples, which are long enough to anchor the turf securely into the compacted base underneath. Plan to place them every six to twelve inches around the perimeter and every couple of feet throughout the center to keep everything tight. A well-secured lawn can handle heavy foot traffic, active pets, and changing weather without any issues. You can find the right fasteners and accessories to ensure your installation is built to last.
Proper Nailing Techniques to Avoid Dimples
When you hammer in your nails or staples, the goal is to make them disappear. A common mistake is driving the nail too deep, which pulls the turf backing down and creates a noticeable dimple on the surface. To avoid this, be careful not to nail too deeply. As you hammer, use your free hand to gently separate the grass blades around the nail. This ensures the blades don’t get trapped under the nail head. The nail should be driven down just enough to be flush with the turf backing, allowing the grass fibers to spring back up and completely hide it from view. This small detail makes a huge difference in the final look of your lawn.
Finishing Edges Against Hardscapes
Getting a clean, crisp edge against hard surfaces like a patio, walkway, or driveway is a signature of a professional installation. After trimming your turf to fit, use a wonder bar or a stiff putty knife to firmly tuck the edge of the turf into the small gap between your base and the hardscape. This creates a tight, clean line and prevents any fraying. Once the edge is tucked, secure it by driving nails every three to four inches, about one inch in from the edge. This technique not only looks great but also provides extra security, ensuring your turf edges stay put. You can see examples of this flawless finish in our project gallery.
Applying the Infill for a Natural Look
The final step is applying the infill, which gives your turf weight, protects the backing from UV rays, and helps the blades stand tall. First, use a power broom or a stiff push broom to brush all the grass fibers upright. This process is often called blooming the turf. Once the blades are standing up, use a drop spreader to apply an even layer of your chosen infill and accessories across the entire surface. Work on a dry day so the material spreads easily. Finally, make another pass with the power broom to work the infill down into the base of the turf, leaving you with a stable, resilient, and beautiful new lawn.
Common DIY Installation Mistakes (and How to Avoid Them)
Even the best artificial turf can look unprofessional if it’s not installed correctly. Taking on a DIY installation is a great way to save money, but it’s easy to make small mistakes that have a big impact on the final result. The good news is that these errors are completely avoidable when you know what to look for. Getting your project right the first time means you’ll have a beautiful, durable lawn you can be proud of for years to come, without the headache of having to fix problems down the road. Let’s walk through the most common slip-ups so you can steer clear of them.
Rushing or Skipping Base Prep
It’s tempting to rush through the groundwork to get to the exciting part: rolling out the green turf. But please, don’t do it. The base is the foundation of your entire project, and cutting corners here is the number one mistake we see. A poorly prepared base leads to lumps, sinking spots, and poor drainage. Proper preparation involves excavating several inches of the existing soil and lawn, then laying and compacting a sub-base of crushed stone. This creates a stable, porous foundation that will keep your turf smooth and even. For a complete walkthrough, you can follow a professional installation guide to ensure your base is built to last.
Forgetting About Proper Drainage
Artificial turf is permeable, but the water still needs somewhere to go. If you install your turf on a perfectly flat surface, you’re essentially creating a shallow, green swimming pool every time it rains. Water pooling can lead to mold, mildew, and a squishy mess. To avoid this, you need to establish a gentle slope that directs water away from your house, patio, or other structures. A good rule of thumb is a 1% grade, or about a quarter-inch drop for every foot of distance. For areas with heavy rainfall or around pools, consider a turf system specifically designed for superior drainage, like our AQUAMAXX® line, which helps manage large volumes of water effectively.
Visible Seams and Uneven Edges
Nothing screams “DIY job” like a visible seam running down the middle of a lawn. Achieving that seamless, natural look is all in the details. First, make sure every piece of turf is rolled out with the fibers leaning in the same direction. If they face opposite ways, the difference in sheen will make the seam obvious. When you’re ready to join two pieces, trim the factory edges off both sides to get the backing as close as possible without overlapping. Use quality seam tape and adhesive to create a strong bond that holds the pieces together tightly. When done right, your seams should be practically invisible, as you can see in our project gallery.
Using Too Little (or Too Much) Infill
Infill is the granular material you spread over the turf after it’s laid down. It’s a critical component that helps weigh the turf down, protects the backing from UV rays, and keeps the grass blades standing tall and looking natural. Two common mistakes are using too little infill or not spreading it evenly. Without enough infill, your turf can look flat and wear out faster. We recommend using a drop spreader to ensure an even application across the entire surface. Afterward, use a power broom to work the granules down into the base of the fibers. Choosing the right infill and accessories is also key, especially for pet areas where odor control is important.
What to Look for When Buying Artificial Turf
With your area prepped, it’s time for the most exciting part: choosing your turf. This decision will impact the look, feel, and longevity of your new lawn, so it’s worth taking a moment to get it right. The best artificial grass for your project depends on your climate, how you’ll use the space, and the aesthetic you’re going for. Think about whether your lawn will be a play area for kids and pets, a pristine decorative space, or a high-traffic zone around a pool. Answering these questions will help you find a product that not only looks great on day one but performs beautifully for years. Let’s walk through the three most important factors to consider.
Material Quality and UV Resistance
The foundation of a long-lasting lawn is quality construction. When you’re comparing turf products, look for those made with superior yarn materials and a resilient, permeable backing. High-quality materials ensure the turf can stand up to foot traffic and the elements without fraying or falling apart. The backing is especially important for durability and drainage, preventing water from pooling on the surface.
Another critical feature is UV resistance. You want your grass to stay green, not fade to a dull, washed-out color after a few seasons in the sun. Better-quality turf has built-in UV inhibitors that protect the fibers from sun damage, keeping the color vibrant over time. Investing in a well-made product from the start saves you from the headache and cost of a premature replacement.
Understanding Turf Materials: Polyethylene, Polypropylene, and Nylon
The fibers, or “yarn,” used in artificial turf are typically made from one of three plastics: polyethylene, polypropylene, or nylon. Polyethylene is the most popular choice for residential lawns because it’s soft to the touch yet incredibly resilient, making it perfect for areas where kids and pets play. Polypropylene is a bit stiffer and is often used for putting greens or as a secondary thatch layer to add cushioning. Nylon is the toughest of the three; it’s exceptionally durable and heat-resistant, which is why you’ll often find it in high-performance sports turf. Many of the best products feature a smart blend of these materials to deliver the perfect balance of softness, strength, and a natural appearance.
Choosing a Turf with a Natural Look
The key to a lawn that looks genuinely real is variation. A natural lawn is never a single, flat shade of green. When you’re shopping, look for grass with different shades of green and some brown flecks mixed in to make it look more like real grass. High-quality turf achieves this by blending multiple colors of yarn. Also, pay attention to the thatch layer—the curly, often tan or brown fibers woven into the base. This mimics the natural layer of dead grass in a real lawn, adding depth, realism, and a little extra cushioning underfoot. You can see how these details come together to create stunningly realistic landscapes in our project gallery.
Check for a Solid Warranty and Product Origin
A good warranty is a sign that the manufacturer stands behind its product. Many good products come with an 8–10 year warranty, and some premium options offer even longer coverage. This warranty typically protects against issues like UV degradation (fading) and manufacturing defects, giving you peace of mind that your investment is protected. It’s also smart to ask about the product’s origin. Knowing where your turf is made can tell you a lot about the quality control standards and safety of the materials used. As a supplier focused on consistent quality, we believe in providing our partners with turf systems built to perform for the long haul, backed by clear specifications and reliable support.
Pile Height and Density: What Do They Mean?
Pile height and density are two terms you’ll see a lot, and they directly influence how your turf looks and performs. Pile height is simply the length of the grass blades, measured from the backing to the tip. A longer pile height can create a lush, luxurious look, while a shorter pile often looks neater and is easier to clean.
Density refers to how many fibers are stitched into the turf’s backing. A denser turf feels more cushioned underfoot and is more resilient, making it a great choice for areas with heavy foot traffic. It helps the blades stand upright and resist matting. The right combination of pile height and density depends on your needs. For a kids’ play area, a dense, medium-pile turf is ideal. For a decorative front yard, you might prefer a taller pile for a more natural appearance. Don’t forget that quality infill is also key to supporting the blades and ensuring great performance.
Find Turf That Stays Cool in the Heat
One of the biggest concerns with artificial turf is heat, especially if you live in a sunny climate. Traditional turf can get uncomfortably hot in direct sunlight. Thankfully, modern turf technology has a solution. Look for products that incorporate cooling features, which can significantly reduce surface temperatures and keep your lawn comfortable for bare feet and paws all summer long. Our HEATMAXX® SOFT series is specifically designed with heat-reflective yarns to stay cooler than other synthetic grasses.
Beyond heat, consider your local climate. If you live in an area with heavy rainfall, drainage is a top priority. A turf system with a highly permeable backing will prevent puddles and ensure water drains through efficiently. Products like our AQUAMAXX® line are built to handle significant water flow, making them perfect for rainy regions or poolside applications.
The Reality of Turf Heat in Direct Sun
Let’s be direct: artificial turf can get warm in direct, intense sunlight, much like sand at the beach or the surface of a deck. While this is a valid consideration, especially for families with kids and pets, modern turf technology offers excellent solutions. The most effective way to manage heat is by choosing a product specifically engineered with heat-reflective yarns, like our HEATMAXX® SOFT series. These advanced fibers are designed to reflect infrared light rather than absorb it, which can significantly lower the surface temperature. For an instant cool-down on the hottest days, a quick spray with a garden hose also works wonders. By selecting the right turf system from the start, you can ensure your lawn stays comfortable and usable all summer long.
Getting the Base and Drainage Just Right
What’s underneath your artificial turf is just as important as the turf itself. A solid base and a smart drainage plan are the unsung heroes of a beautiful, long-lasting lawn. Getting this foundation right prevents sinking, wrinkles, and puddles, ensuring your turf performs perfectly for years. Think of it as the essential prep work that guarantees a professional result. Before you even unroll your turf, you need a clear strategy for managing water. A well-prepared ground is the difference between a lawn that looks good on day one and a lawn that looks great for a decade. Our complete installation guide covers the entire process, but paying special attention to your base and drainage will save you from major headaches later on.
How to Plan for Effective Drainage
The first rule of drainage is simple: water needs somewhere to go. Your goal is to create a gentle, consistent slope that directs water away from your house, patio, and other structures. A good rule of thumb is to create a slope of at least 2%, which means the ground should drop about a quarter-inch for every foot. This ensures rainwater flows off the surface and into the surrounding landscape instead of sitting on top of your turf. While our turf systems, especially the AQUAMAXX® line, are designed for maximum drainage with highly permeable backings, they can’t work miracles on a flat or improperly graded surface.
How to Prevent Puddles on Your New Lawn
Nothing ruins the look and feel of a new lawn faster than standing water. Puddles not only make the turf soggy and unpleasant to walk on, but they can also lead to mold, mildew, and damage to the base over time. The key to preventing this is a perfectly graded and compacted base. After you’ve established your slope, make sure your base material (like decomposed granite or crushed stone) is evenly distributed and tightly compacted. This creates a stable, smooth surface with no low spots where water can collect. Using the right infill and accessories also helps keep the turf fibers upright and allows water to drain through effectively.
Do You Need Perforated Pipes?
For most projects, a proper slope is all you need. But if your yard has heavy clay soil that doesn’t absorb water well, or if you live in an area with frequent, heavy rainfall, you may need a more robust solution. This is where perforated pipes, often used in a French drain system, come in. These pipes are laid in a trench filled with drain rock underneath your base layer. They actively collect excess water that seeps through the turf and base, channeling it away from the area entirely. This is a pro-level step that ensures your lawn stays dry and usable even in the wettest conditions.
Keeping Your New Lawn Looking Great
You’ve done the heavy lifting, and your new lawn is almost ready. The final steps are all about the finishing touches and understanding how to keep your turf looking fantastic for years. Unlike a natural lawn that demands constant mowing, watering, and weeding, synthetic turf requires just a little routine attention to stay green, clean, and inviting. A simple care plan protects your investment and ensures your space is always ready for backyard barbecues, kids’ playtime, or just relaxing in the sun. These straightforward maintenance tips will help you enjoy your beautiful, low-maintenance lawn to the fullest.
“Blooming” Your Turf: The First Brushing
Right after you spread the infill, your turf needs a good brushing. This process, often called “blooming,” helps the synthetic grass blades stand upright for a full, natural look. It also works the infill down into the base of the turf, where it can provide the best support and cushioning. For the best results, use a power broom or a stiff brush with synthetic bristles. Always brush against the natural grain of the turf fibers to lift them effectively. This initial brushing is one of the most important finishing touches in your installation, as it sets the stage for how your lawn will look and perform from day one.
A Simple Cleaning and Maintenance Routine
Keeping your artificial turf clean is simple. For general debris like leaves and twigs, you can use a leaf blower, a flexible lawn rake, or a stiff brush. If you have pets, it’s a good idea to have a dedicated cleaning routine. Remove solid waste as soon as you spot it, just as you would with a natural lawn. Rinsing urine spots with a garden hose and cool water will prevent odors from building up. For homes with furry friends, choosing a turf system designed for pets, like our PETMAXX® series, provides superior drainage and durability to handle daily use and make cleanup even easier.
Long-Term Tips for a Picture-Perfect Lawn
To maintain that fresh, just-installed look, a little long-term care goes a long way. In high-traffic areas where the fibers might get matted down, occasional brushing will fluff them right back up. A good rule of thumb is to give the entire lawn a deep cleaning and brushing with a power broom about once a year. This is also a great time to check your infill levels. If some areas look a little low, you can top them off with fresh infill and accessories to restore bounce and support. This simple annual check-up will keep your turf resilient, clean, and ready for anything.
Related Articles
Frequently Asked Questions
How much money can I realistically save by doing it myself? The cost of professional installation can often be as much as the materials themselves, so taking on the project yourself can cut your total budget significantly. While you’ll still invest in high-quality turf and base materials, you are essentially trading your time and effort for the cost of labor. For many homeowners, this can mean saving several thousand dollars, making it a very worthwhile project.
What’s the single most important step I shouldn’t rush? Without a doubt, it’s preparing the base. Everything you do here, from clearing the old lawn to compacting the crushed stone, creates the foundation for your entire project. A solid, smooth, and properly graded base is what prevents lumps, sinking spots, and drainage problems down the road. Rushing this step is the one mistake that is hardest to fix later, so take your time to get it perfect.
Is artificial turf a good choice if I have pets? Yes, it’s an excellent choice for pet owners. A quality turf system eliminates muddy paws and provides a durable surface that can stand up to daily play. For best results, look for a product specifically designed for pets, like our PETMAXX® series. These systems feature enhanced drainage to handle liquid waste easily and a resilient construction that resists digging and heavy use, making cleanup simple.
My yard doesn’t drain well. Can I still install turf? You absolutely can, but you’ll need to pay extra attention to your base and drainage plan. Creating a proper slope to guide water away from the area is critical. You’ll also want to build a deep, compacted base of porous material to help water filter through. For yards with significant drainage challenges, installing a French drain system beneath the base might be the best solution to ensure your lawn stays dry and usable.
How do I keep my new turf looking good over the years? Long-term care is surprisingly simple. The most important tasks are removing leaves and debris with a blower or rake and rinsing the surface with a hose as needed, especially in pet areas. About once a year, it’s a good idea to use a power broom or stiff brush to fluff up the fibers in high-traffic spots. This small amount of upkeep is all it takes to keep your lawn looking green and full for years.
Leave a Reply